Via GeekDad's post Make Custom Coloring Books with Photoshop a link to fototiller's post coloring pages from your photos - 3 easy photoshop steps.
Brilliant!
Tuesday, July 31, 2007
DIY: Photograph to colouring sheet
Tuesday, July 17, 2007
Paper plate fan
This was created at our local Ontario Early Years Centre.
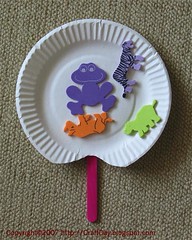
Materials:
- paper plate with dimple cut out of it
- popsicle / craft stick
- tape (or glue)
- stickers
- optional: anything else to decorate, such as crayons, markers, paint, glitter
Instructions:
- tape or glue the popsicle stick to the underside of the plate, centred with the dimple cut out
- decorate plate
- enjoy your fan!
Monday, July 16, 2007
Saturday, July 14, 2007
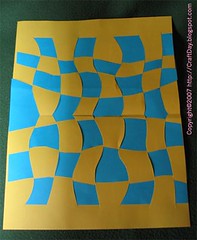
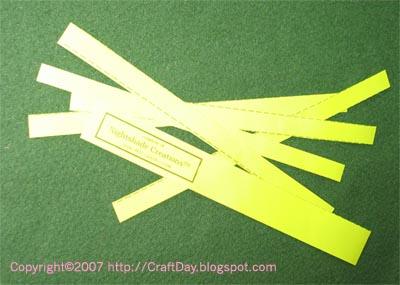
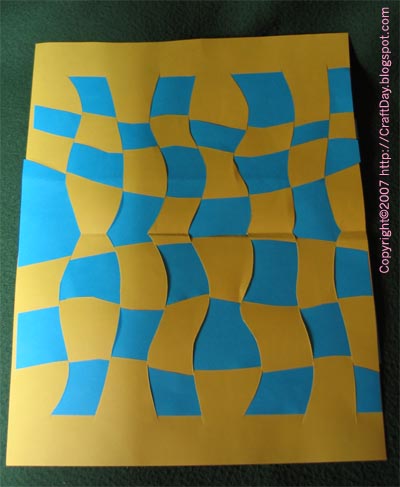
Woven paper placemats
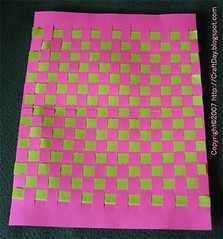
Materials:
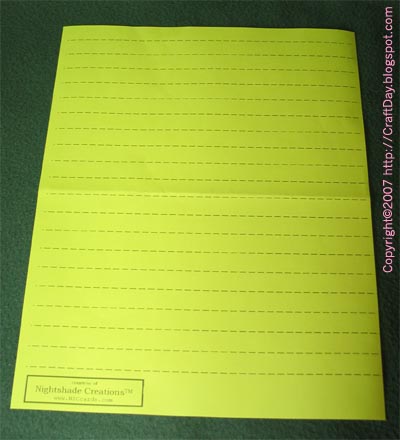
- A pattern for the frame (download PDF)
- A pattern for the strips (download PDF)
- Two pieces of 8.5" x 11" paper of contrasting colour or pattern
- should you wish, materials for decorating or laminating your placemat
Instructions:
- print out the each of the above patterns (PDF file*) and transfer the pattern to your desired material or print it out as a practise run (be sure to check the specifications of your printer before printing on unusual media -- using "out of spec" materials can cause permanent damage to your printing hardware)
- start with the paper that will be the placemat frame
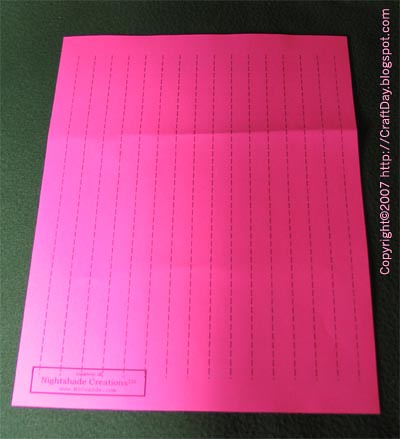
- fold it in half lengthwise
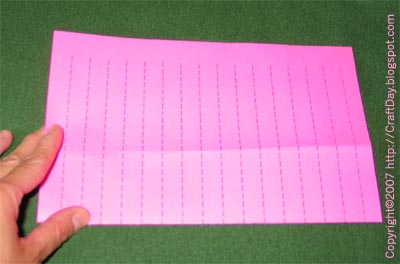
- cut along the dotted lines started from the folded edge toward the open edge (make sure you stop before you get to the open edge!)
- when you're finished cutting all the lines, open the paper out
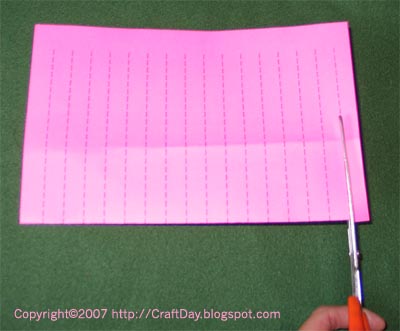
- put the frame aside and take the sheet of paper with the template for the strips
- cut along the dotted lines right across the page
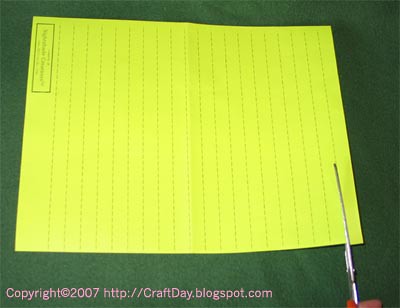
- until you have a fist full of strips

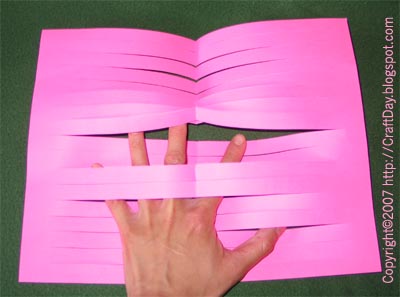
- take the frame and orient it so that the longest section is vertical. Then take a strip and begin to weave it over and under through the frame
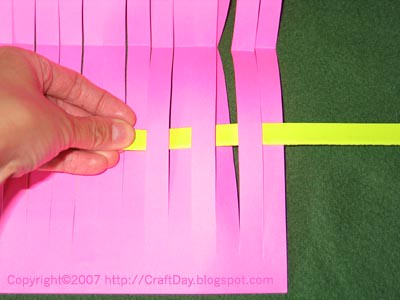
- once it's through to the other end, gently push the strip down to the bottom edge as far as it will go. Start with the second strip -- if the first strip started over, the second strip should start under. (And vice versa.)
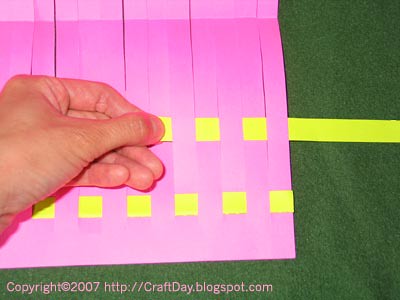
- gently snug the second next to the first strip
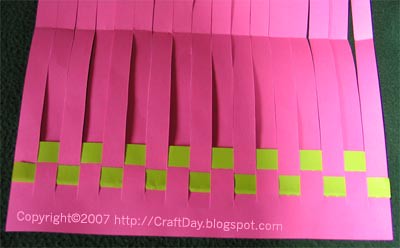
- keep going until you've run out of room on your frame

- depending on how tightly the strips were snugged, you may have a handful of strips left over
- should you wish to decorate (paint, marker, crayon, glitter) do so before you laminate (should you wish to)
Now, if you're tired of being on the straight and narrow, go free-style! The sky is the limit!
Hints:
- for people with less patience, make the strips and the slots in the frame wider (for example, cut every other line)
- if you're going to do a pattern that's not simply straight edges, cut one strip at a time and place it into the frame before you cut the next strip (or number the strips as you cut them so you can keep track of the order)
- using magazine photos or hand-drawn pictures on either your frame or the strips (or both) can lead to fun results!
- if you don't like the fold in the middle of the frame, have a responsible adult use an X-Acto type knife and cutting pad to make the cuts with the frame paper flat out
--
(*) When printing out PDF documents, be sure to set "Page Scaling" to "none" (you'll want the document to print at 100%). You may need to adjust the position of the template on your paper depending on your printer's "offset" settings.
Friday, July 13, 2007
Treasure chest
A terrific idea for re-using baby-wipe boxes, by using them to create treasure chests, is posted over at GeekDad!
Tuesday, July 10, 2007
Caterpiller
This was created at our local Ontario Early Years Centre.
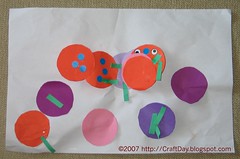
Materials:
- multicoloured construction paper cut into circles
- green construction paper cut into strips for legs
- glue (white or glue stick)
- optional: pipe cleaners for antennae (construction papper works too)
- optional: stickers, markers, glitter etc to decorate the body
- optional: stickers for eyes (marker or crayon works too)
- optional: legal sized paper upon which to mount final product
Instructions:
- glue the circles together overlapping about 20%
- the caterpiller can be straight or wavy
- glue to the legs to the underside of the caterpiller and decorate the body
- mount the entire caterpiller to a sheet of paper or leave free
Subscribe to:
Posts (Atom)
 Subscribe to my feed
