(This idea came home from school.)
Materials:
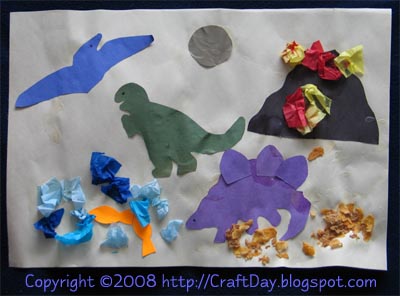
- large sheet of paper
- construction paper (blue, purple, green) cut like dinosaur silhouettes
- orange construction paper cut as fish
- black construction paper cut as a volcano
- tissue paper squares (shades of blue, orange, red, yellow)
- corn flakes
- glue
Instructions:
- have child glue dinosaurs and volcano to paper (fish near the bottom)
- have child scrunch blue tissue paper and glue near fish for water
- have child scrunch orange, red, yellow tissue paper and glue along volcano for lava
- glue crushed corn flakes to bottom of page for texture


 Subscribe to my feed
