Showing posts with label made at school. Show all posts

Friday, August 09, 2013

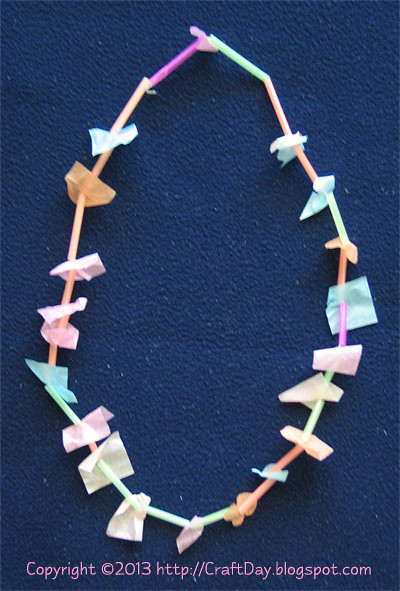
Hawaiian style necklace

2013_08_09_hawaiian_necklace

(This idea came home from school.)


Materials:
  • string or thin yarn
  • colourful straws cut into small pieces
  • colourful pieces of tissue paper (shown), wrapping paper or lightweight fabric
Thursday, December 17, 2009

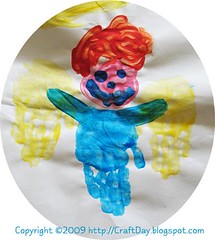
Handprint angel

2009_12_angel_handprint

(This idea came home from school.)

Materials:
  • large sheet of thick paper
  • at least four colours of finger paint
  • smock for covering child's clothing

Instructions:
  • decide on the colour of the angel's body
  • paint child's hand with "body" colour and create handprint in middle of the page
  • clean hand
  • paint both of child's hand with "wing" colour and create wings on either side of the body
  • let paint dry
  • have child pick colours for angel's face and hair, paint same and let dry
  • use "body" colour to create "shoulders" attaching the body to the wings
  • have child paint eyes and mouth on face
  • you now have a handprint angel!

Tuesday, December 16, 2008

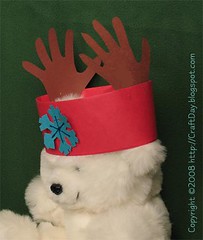
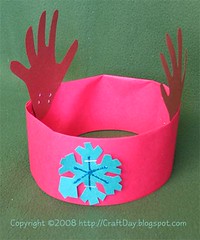
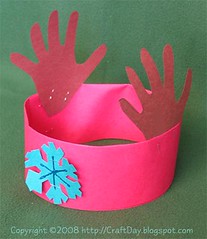
Reindeer antler headband

2008_12_reindeer_antlers_bear

(This idea came home from school.)

Materials:
  • 2 sheets of coloured construction paper, about 16cm x 30cm (3" x 12 ") to make the headband - red shown
  • brown construction paper, big enough to cut out two child size hands (antlers)
  • pencil for tracing hands
  • scissors
  • clear tape
  • stickers, markers, glue etc for decorating headband

Instructions:
  • fold the coloured construction paper in half lengthwise (so you have two sheets 8cm x 30cm)
  • slip one of the folded sheets inside the other (keeping the folded edges in the same orientation) overlaping about 5cm (2") and tape to hold in place
  • optional: have child decorate construction paper (dry fit around child's head so you know where the decorations should stop)
  • have an adult wrap the length of construction paper around the circumference of the child's head and tape to fit
  • have an adult trace the child's open hands on the brown construction paper
  • have an adult cut out the hand outlines, being sure to include 3cm (1") for the wrists
  • tape the cut out hands by the wrists to the inside of the headband, opposite each other
  • outfit your little reindeer with their new antlers!


2008_12_reindeer_antlers_centre 2008_12_reindeer_antlers_left

Sunday, December 14, 2008

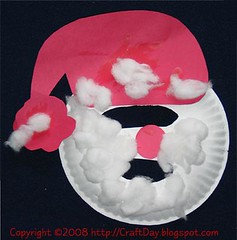
Santa mask

2008_12_santa_mask

(This idea came home from school.)

Materials:
  • paper plate
  • cotton batting / cotton balls
  • white glue
  • red construction paper cut out like Santa's hat
  • red construction paper cut into a circle for the nose
  • scissors
  • ruler
  • optional: crayons, markers, stickers, glitter for decorating
  • optional: craft stick to make a handle for the mask

Instructions:
  • adult: mark a "T" shape on the back of the mask (the eating surface of the paper plate)
  • adult: measure approximate width of child's eyes across face (outer corner of eyes) and mark that as the top of the "T"
  • adult: measure approximate distance of eyes to mouth of child and use this to mark the vertical length of the "T"
  • adult: cut out the top of the "T" and the very bottom of the "T" to make holes from which child can see and speak
  • have child glue cotton and nose on mask
  • have child decorate as desired
  • mask can be held up to face
  • optional: attach craft stick to bottom of mask to use as handle

Friday, July 25, 2008

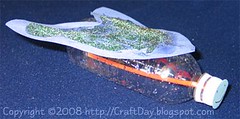
Firefly / glow bug

glow_bug_angle

(This idea came home from school.)

Materials:
  • empty and dry clear plastic water bottle
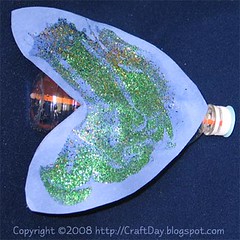
  • construction paper (approx 20cm x 20cm / 8" x 8") cut into the shape of wings
  • things with which to decorate the wings of the bug (shown are glue and glitter, could also use stickers, markers, paint etc)
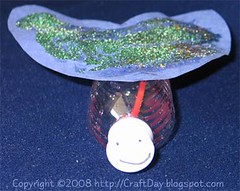
  • small piece of paper the size of the top of the cap of the bottle (shown is a circle approx 3cm in diameter / just over an inch in diameter)
  • things with which to decorate the face of the bug (shown is marker, could also use stickers, markers, paint etc)
  • glue
  • glow stick / light stick approximately the length of the bottle (shown is approx 20cm / 8") -- the more glow sticks you have the brighter the bug glows!

Instructions:
  • apply decorations to the construction paper cut out for the wings (see view below)
    glow_bug_top

  • glue the wings to the bottle and wait until glue dries (I prefer to let the glue set overnight) -- you can continue with the face part, as there's more gluing there and more overnight waiting too
  • decorate the face of the bug
  • while the bottle cap is screwed snuggly onto the bottle, glue or tap the face of the bug with the face oriented appropriately relative to the wings and let the glue dry (I prefer to let the glue set overnight)
    glow_bug_front

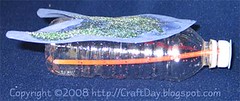
  • when it's dark, or when you have access to a dark room, activate one or more of your glow sticks and put them in the bottle
  • close bottle cap
Enjoy your firefly!

glow_bug_side

Tuesday, June 03, 2008

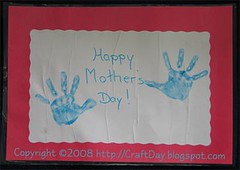
Handprint placemat

handprint_placemat

(This idea came home from school.)

Materials:
  • large sheet of coloured construction paper
  • smaller sheet of white paper (shown cut with scalloped edges)
  • marker / crayon for drawing on paper
  • fingerpaint for making handprint
  • glue
  • smocks to keep child and adults clean
  • clear contact paper or laminate large enough to cover the sheet of construction paper

Instructions:
  • write any messages ("Happy Mother's Day," "Happy Father's Day," "Happy Birthday" etc) on the white sheet of paper leaving room for two handprints
  • have child make handprints around text
  • glue white sheet of paper to construction paper
  • laminate
This is a terrific gift idea for a "special" occasion such as Mother's Day, Father's Day or a parent / grandparent birthday!

Tuesday, April 29, 2008

Bird's nest

birds_nestThis idea came home from school. I wish I had the exact recipe!

The nest is made of crushed shredded wheat and melted marshmallows. The eggs are candy covered chocolate eggs. And the Peep is a terrific finishing touch!

Angry Chicken has a yummy looking recipe for making chocolate nests!
Tuesday, April 08, 2008

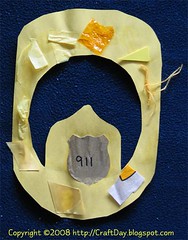
Firefighter's hat

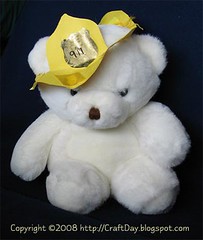
fire_fighters_hat_flat fire_fighters_hat_model


(This idea came home from school.)

Materials:
  • a sheet of yellow or red construction paper approx 29cm x 20.5cm (11.5"x 8"), with an ovalish hole cut in it approximating 16cm x 18cm (6.25"x 7") (this will vary depending on the size of your child's head), this will from the brim of the hat
  • a piece of the same colour construction paper that's about 10cm x 10cm (4" x 4") which can be cut into the shape of the front of a firefighter's hat (the first photo above shows the whole design cut out of a single piece of paper)
  • gold or silver wrapping paper about 6cm 7cm (2.25" x 2.75") cut into the shape of a firefighter's crest
  • glue
  • things with which to decorate the hat (stickers, paper scraps, tissue paper, sparkles etc)

Instructions:
  • have child glue crest on "front of hat"
  • have child glue decorations on hat
  • if the "front of hat" is a separate piece, glue or tape to the brim, fold upwards at a 90 degree angle (see second photo above)
  • enjoy your hat!

(This craft can also serve as a reminder to work on your Family Fire Escape Plan.)

Saturday, April 05, 2008

Sidewalk Chalk Paint

Is your little one itching to get at the sidewalk chalk even though the weather isn't co-operating? Get them to "paint" with their chalk inside!

sidewalk_chalk_paint

(This idea came home from school.)

Materials:
  • sidewalk chalk
  • sturdy paper (finger paint paper is good)
  • container to hold water

Instructions:
  • have child dip chalk in water until very wet
  • child can then "paint" with the chalk on the paper

Tuesday, March 25, 2008

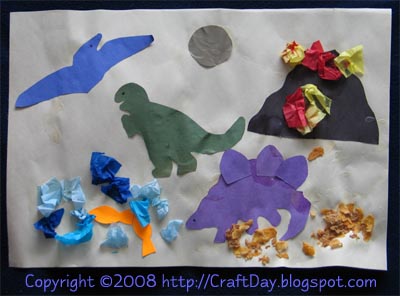
Dinosaur landscape

dinosaur_landscape

(This idea came home from school.)

Materials:
  • large sheet of paper
  • construction paper (blue, purple, green) cut like dinosaur silhouettes
  • orange construction paper cut as fish
  • black construction paper cut as a volcano
  • tissue paper squares (shades of blue, orange, red, yellow)
  • corn flakes
  • glue

Instructions:
  • have child glue dinosaurs and volcano to paper (fish near the bottom)
  • have child scrunch blue tissue paper and glue near fish for water
  • have child scrunch orange, red, yellow tissue paper and glue along volcano for lava
  • glue crushed corn flakes to bottom of page for texture

Sunday, March 09, 2008

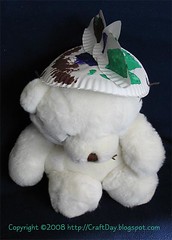
Stegosaurus hat

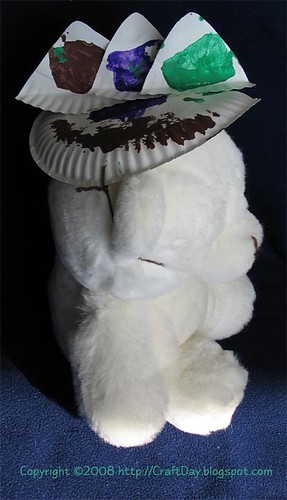
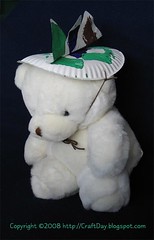
stegosaurus_hat_1(This idea came home from school.)

Materials:

  • whole paper plate (the one shown is 23 cm (about 9") in diameter)
  • paper plate cut in quarters or sixths (depending on how much mileage you ant to get out of them) -- note the rounded corners in the photo to the right
  • bits of sponge for dipping into paint (the ones used were approximately 6cm x 4cm (2.5"x1.5"))
  • Stegosaurus coloured paint (purple, brown and green)
  • two 40cm (16") pieces of Stegosaurus coloured yarn (purple, brown or green)
  • hole punch
  • stapler

Instructions:
  • have child sponge paint of different colours on the bottom of the whole plate
  • have child sponge paint of different colours on both sides of the pieces of plate (do one side, let it dry, do the other)
  • fold the plate pieces at right angles, along the outer edge
  • have an adult staple the plate pieces along the middle of the painted whole plate, akin to a spine (make sure the staples are completely folded over with no sharp edges exposed)
  • have an adult punch one hole at the top and one hole at the bottom of the plate
  • adult to tie one piece of yarn through each hole
  • place hat on child's head and tie under child's chin

WARNING:
The finished product could be a choking hazard if child left unsupervised. Child safety is your responsibility!
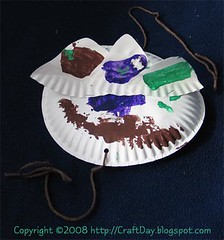
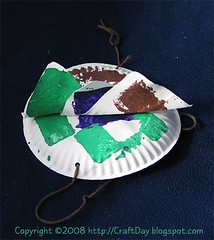
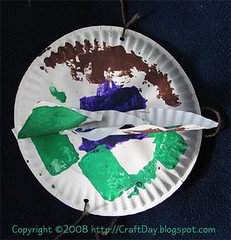
stegosaurus_hat_2 stegosaurus_hat_3 stegosaurus_hat_4
stegosaurus_hat_5 stegosaurus_hat_6

Tuesday, March 04, 2008

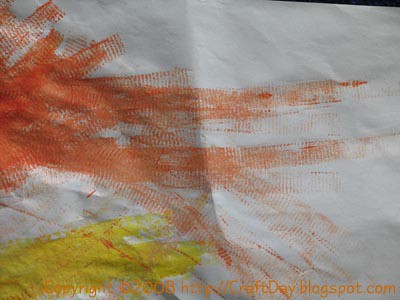
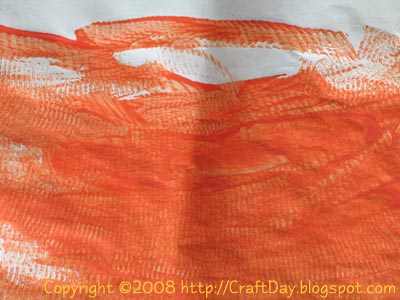
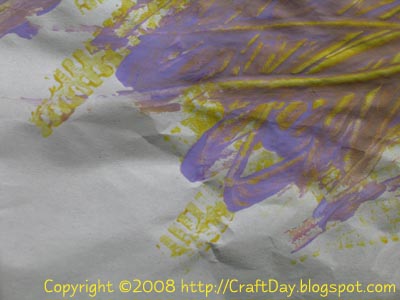
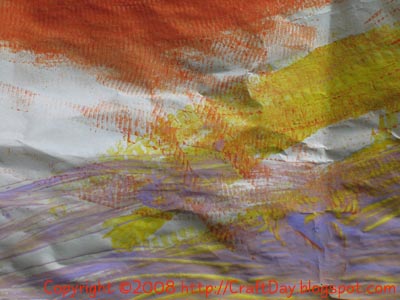
Exploring patterns with paint (and toy cars)

paint_pattern_1

(These ideas came home from school.)

Materials:
  • large sheet of paper
  • washable paint of various colours
  • washable (plastic) toy cars or trucks with interesting tire treads

Instructions:
  • assign one vehicle per colour of paint
  • have child dip vehicle tires in paint and then drive all over the paper
  • explore patterns on the paper
  • explore repeating patterns overtop each other (within same colour)
  • explore what happens when paint colours mix
  • explore which colours show up on other colours

paint_pattern_2

paint_pattern_3


paint_pattern_5


Of course, if you really want to get into the swing of things, get them to paint a car with using the wheels of a car!

paint_patterns_car

Sunday, March 02, 2008

Paper towel roll bird feeder

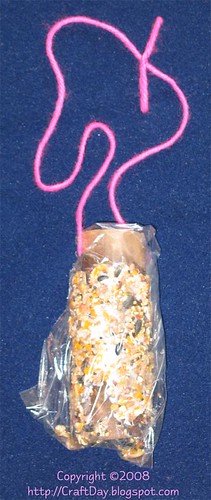
bird_feeder(This idea came home from school.)

Materials:

  • sturdy paper towel roll, cut to a 13cm (about 5") length
  • hole punch
  • sturdy string or yarn 30cm (about 12")
  • lard
    [The debate rages on as to whether or not lard is bad for birds, you'll have to do your own research and come up with your own conclusion about the suitability of this ingredient. While we're at it, you may want to consider whether you feel putting up a bird feeder has a negative impact on birds' natural ability to find food or migrate south. But I digress.]
  • bird seed (if you have squirrels in your area, consider getting squirrel proof bird seed)
  • cookie tray

Instructions:
  • punch two holes opposite each other in the top of the paper towel roll piece, about 2 cm from the edge of the tube
  • thread the string or yarn through the holes and tie both ends together tightly
  • spread a thin layer of seed on a cookie tray
  • rub lard over the paper towel roll (cover the child's hand with a plastic baggie if you don't want to deal with little lardy hands)
  • roll the lardy paper towel roll in the seed, until most of the lard is covered with seed
  • hang on a tree and wait for the birds to come!
(Photo shows bird feeder wrapped in a plastic bag for transport. Do not hang bird feeder while covered with a plastic bag!)

WARNING:
The finished product could be a choking hazard if child left unsupervised. Child safety is your responsibility!
Saturday, February 23, 2008

Paper snowman

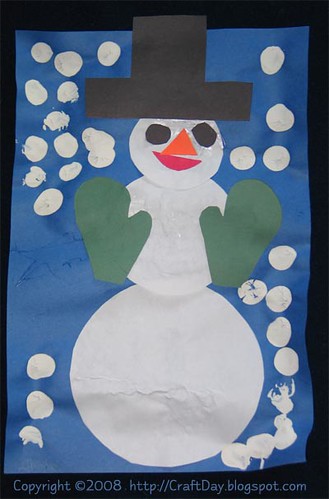
snowman

(This idea came home from school.)

Materials:
  • large sheet of blue construction paper
  • white paper cut into three circles (large, medium and small)
  • coloured construction paper cut into the shape of mittens
  • optional: black construction paper cut into the shape of a hat and two round eyes
  • optional: orange construction paper cut into a triangle
  • optional: red construction paper cut into the shape of a mouth
  • glue
  • white tempra paint and big round paint brush (alternately, an old bottle cork will do)
  • optional: other colours of paint to add / decorate hat, eyes, nose, mouth etc

Instructions:
  • have child glue the circles -- largest at the bottom of the sheet, smallest at the top
  • add mittens, hat, eyes, nose and mouth
  • dab paint to make snowflakes falling from the sky (the paint on this image was dabbed on with an old bottle cork)

Sunday, February 10, 2008

Heart sun catcher

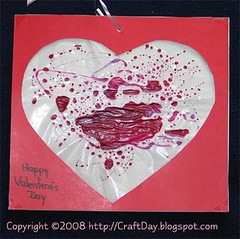
heart_sun_catcher

(This idea came home from school.)

Materials:
  • white paper, letter sized (approx 22cm x 28cm or 8.5" x 11")
  • waxed paper (approx 22cm x 28cm or 8.5" x 11")
  • red paper (approx 22cm x 28cm or 8.5" x 11")
  • red acrylic paint
  • hole punch
  • scissors
  • white glue
  • ribbon (white, pink or red)

Instructions:
  • cut a large heart out of the red paper (leaving a red heart-shaped frame)
  • splatter red acrylic paint on waxed paper (in approximate area of cut-out of red sheet)
  • let red paint dry over night
  • glue waxed paper on top of white sheet of paper
  • glue red heart frame on top of waxed paper
  • let dry
  • punch hole in centre top of heart
  • put length of ribbon through hole, tie and hang on window

Wednesday, February 06, 2008

Heart necklace

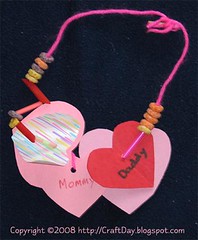
heart_necklace

(This idea came home from school.)

Materials:
  • red, pink or white yarn, approximately 60 cm (2 feet) in length
  • blunt tip darning needle
  • cut-out hearts (size depending on age of child ... larger heart 8cm x 8cm (3"x3") for pre-schooler, smaller for grade-schooler) from different types and colour of paper
  • additional items for stringing: 2-3cm (1") length of coloured drinking straws, coloured pasta, multi-coloured "O" breakfast cereal etc
  • pen / marker / crayon for writing on hearts
  • hole punch

Instructions:
  • punch hole at approximately the centre of each paper heart
  • have child tell you the names of people they love, write each name on a separate heart (older children can do this part on their own)
  • thread yarn through darning needle
  • help child pass darning needle through decorations to start and then alternating between hearts and decorations until all hearts have been strung
  • finish with more decorations
  • tie loose ends together to complete necklace

WARNING:
The finished product could be a choking hazard if child left unsupervized. Child safety is your responsibility!
Thursday, December 20, 2007

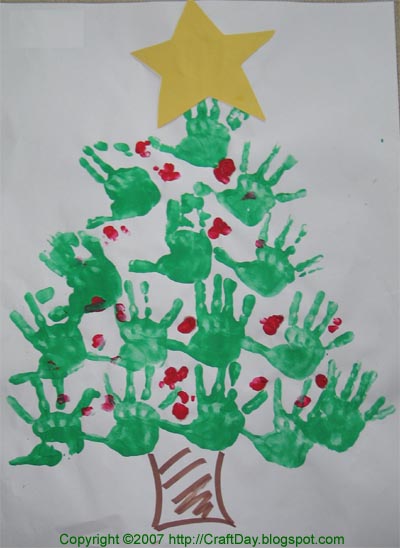
Christmas hand print tree

hand-tree

(This idea came home from school.)

Materials:

  • large sheet of paper
  • red and green finger paint
  • brown marker
  • yellow construction paper cut into the shape of a star
  • glue
  • smocks to keep child and adults clean


Instructions:

  • have the child make a row of five green palm-prints, side by each, about 20cm (4 inches) from the bottom of the page
  • have the child make a row of four 4 palm prints above that
  • again with three, two and one final palm print at the top of the "tree"
  • use red paint on fingertips to paint tree decorations / ornaments
  • glue the yellow star at the top of the tree
  • draw in a brown tree trunk at the bottom of the tree (alternately, use brown paint to paint a trunk or make a construction paper trunk)

Friday, October 26, 2007

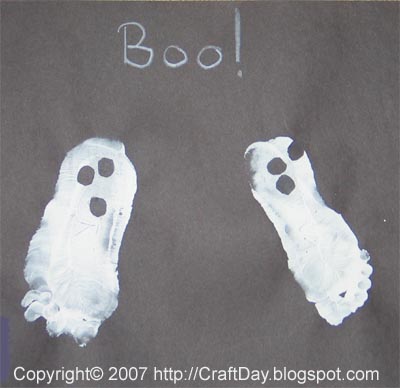
Ghost feet

2007_10_26_ghost_feet

(This idea came home from school.)

Materials:
  • large sheet of black construction paper
  • white, water soluble paint
  • glue
Instructions:
  • coat child's feet with white paint
  • have them make two white foot prints on the black paper
  • orient the paper so that the heel part of the print is the "top"
  • cut out 6 small black circles
  • glue the circles as two eyes and a mouth on the heel of each footprint
  • beware the scary ghosts!

NOTE: if the child is reluctant to make foot prints, hand prints can be substituted
Tuesday, October 23, 2007

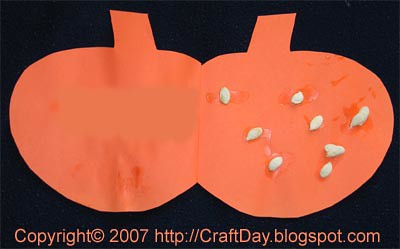
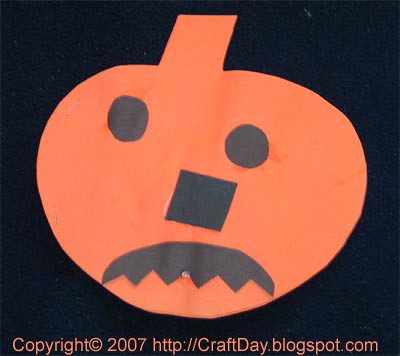
Pumpkin book

2007_10_22_pumpkin_book 2007_10_22_pumpkin_book_2

(This idea came home from school.)

Materials:
  • orange construction paper
  • black construction paper
  • scissors
  • white glue
  • stapler
  • pumpkin seeds
Instructions:
  • adult to cut out two identical pumkins from the orange paper
  • adult to places both pieces of pumpkin one on top of each other and staple together along the left hand side (like a book)
  • adult to cut out pumpkin eyes, nose and mouth from black construction paper
  • child to glue pumpkin face on top pumpkin
  • open pumpkin book and have child glue seeds on the inside "page" of the pumpkin book

Monday, October 22, 2007

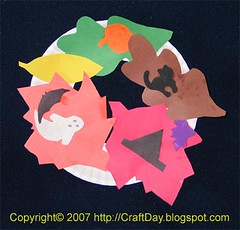
Hallowe'en wreath

2007_10_20_halloween_wreath

(This idea came home from school.)

Materials:

  • paper plate with centre cut out
  • construction paper: red, green, brown, yellow, black, orange, white, purple
  • scissors
  • glue
Instructions:
  • adult to cut large leaves out of red, green, brown and yellow construction paper
  • adult to cut smaller pumpkins, cats, bats, ghosts, witches' hats, out of orange, black, white and purple construction paper
  • glue leaves to wreath as background design
  • glue Hallowe'en themed cut-outs on top of leaves