Showing posts with label christmas. Show all posts

Tuesday, July 24, 2012

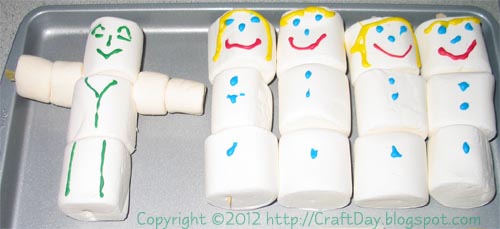
Snowmen in summer

2012_07_24_summer_snowmen


Materials:
  • Marshmallows (varying sizes if you want to get fancy)
  • Toothpicks or skewkers to hold the mashmallow's together
  • Decorative icing

Instructions:
  • Assemble marshmallow's as desired
  • Decorate accordingly

Saturday, December 19, 2009

Salt-dough ornaments

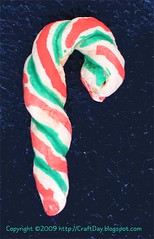
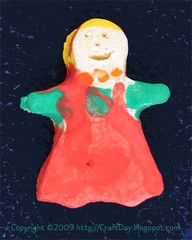
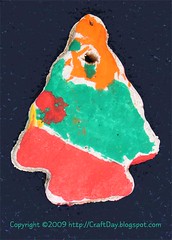
2009_12_salt_dough_candycane 2009_12_salt_dough_girl 2009_12_salt_dough_tree

We used this recipe for the salt-dough, with the following modifcations:

Ingredients:
  • 4 cups all-purpose flour
  • 1 cup salt
  • 1 1/2 cups water [water should be hot or warm]
Be sure to read all of the comments in the original recipe. There are terrific ideas about adding spices and observations about baking time. We made WAY MORE than one dozen ornaments.

Materials:
  • salt-dough (recipe above)
  • rolling pin
  • extra flour
  • cookie cutters
  • spatula
  • cookie sheets
  • cooling rack
  • poster paint, markers, googly eyes, fabric bits, glitter, glue, yarn
  • shellac or polyurethane
  • ribbon / thread

Instructions:
  1. Preheat oven to 300 degrees F (150 degrees C).

  2. Combine the flour, salt and water; mix well and knead for 10 minutes. With a lightly floured rolling pin, roll out on a lightly floured surface.

    Note: The oranments above are about 1.2cm (3/8") thick, which took A LOT LONGER to bake / dry then the instructions in the original recipe state. Next time we're going to make them much thinner!

  3. With lightly floured cookie cutters cut into desired shapes and make holes for hanging.

    Note: If you want the final product to have smoothed edges and rounded corners, do this BEFORE you bake. Dough does not reshape as when baking cookies for eating.

  4. For candy cane shown above, roll out a thin dough "string" between your hands. At about the half-way point begin to twist the two "strings" around each other. Shape into a hook / candy cane.

  5. Bake for 30 minutes.

    Note: Keep checking on the progress. Ours were in for well over an hour before they were considered done.

  6. Place on rack to cool.

  7. Decorate with paints or markers.

  8. Allow to dry and spray with clear polyurethane or shellac on both sides to preserve. Allow to dry.

    Note: If the shellac or polyurethane cover is not complete, moisture will get into the dough and the ornament will fall apart. If you wish to keep the ornaments for a long time, you may need to recoat them with polyurethane or shellac every year.

  9. Using glue if required, add stickers, googly eyes, fabric bits or yarn for hair.

  10. Use ribbon or thread to hang.

Thursday, December 17, 2009

Handprint angel

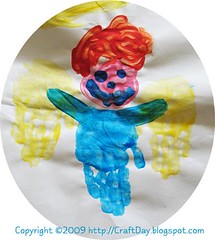
2009_12_angel_handprint

(This idea came home from school.)

Materials:
  • large sheet of thick paper
  • at least four colours of finger paint
  • smock for covering child's clothing

Instructions:
  • decide on the colour of the angel's body
  • paint child's hand with "body" colour and create handprint in middle of the page
  • clean hand
  • paint both of child's hand with "wing" colour and create wings on either side of the body
  • let paint dry
  • have child pick colours for angel's face and hair, paint same and let dry
  • use "body" colour to create "shoulders" attaching the body to the wings
  • have child paint eyes and mouth on face
  • you now have a handprint angel!

Tuesday, December 16, 2008

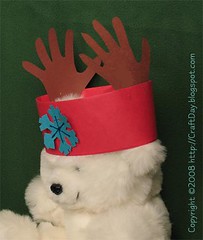
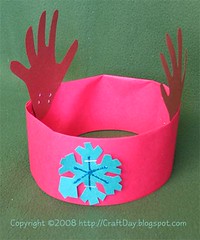
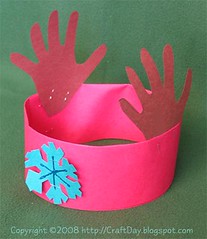
Reindeer antler headband

2008_12_reindeer_antlers_bear

(This idea came home from school.)

Materials:
  • 2 sheets of coloured construction paper, about 16cm x 30cm (3" x 12 ") to make the headband - red shown
  • brown construction paper, big enough to cut out two child size hands (antlers)
  • pencil for tracing hands
  • scissors
  • clear tape
  • stickers, markers, glue etc for decorating headband

Instructions:
  • fold the coloured construction paper in half lengthwise (so you have two sheets 8cm x 30cm)
  • slip one of the folded sheets inside the other (keeping the folded edges in the same orientation) overlaping about 5cm (2") and tape to hold in place
  • optional: have child decorate construction paper (dry fit around child's head so you know where the decorations should stop)
  • have an adult wrap the length of construction paper around the circumference of the child's head and tape to fit
  • have an adult trace the child's open hands on the brown construction paper
  • have an adult cut out the hand outlines, being sure to include 3cm (1") for the wrists
  • tape the cut out hands by the wrists to the inside of the headband, opposite each other
  • outfit your little reindeer with their new antlers!


2008_12_reindeer_antlers_centre 2008_12_reindeer_antlers_left

Sunday, December 14, 2008

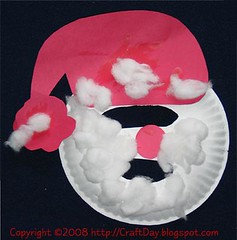
Santa mask

2008_12_santa_mask

(This idea came home from school.)

Materials:
  • paper plate
  • cotton batting / cotton balls
  • white glue
  • red construction paper cut out like Santa's hat
  • red construction paper cut into a circle for the nose
  • scissors
  • ruler
  • optional: crayons, markers, stickers, glitter for decorating
  • optional: craft stick to make a handle for the mask

Instructions:
  • adult: mark a "T" shape on the back of the mask (the eating surface of the paper plate)
  • adult: measure approximate width of child's eyes across face (outer corner of eyes) and mark that as the top of the "T"
  • adult: measure approximate distance of eyes to mouth of child and use this to mark the vertical length of the "T"
  • adult: cut out the top of the "T" and the very bottom of the "T" to make holes from which child can see and speak
  • have child glue cotton and nose on mask
  • have child decorate as desired
  • mask can be held up to face
  • optional: attach craft stick to bottom of mask to use as handle

Thursday, December 20, 2007

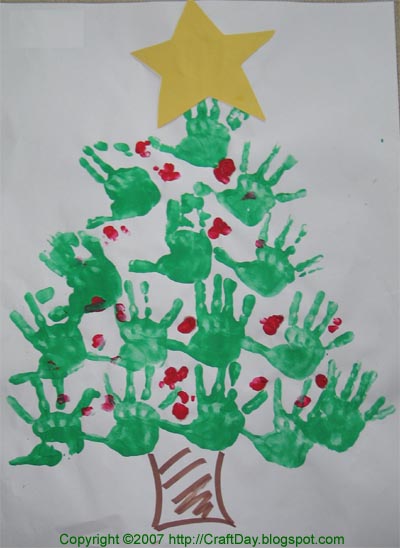
Christmas hand print tree

hand-tree

(This idea came home from school.)

Materials:

  • large sheet of paper
  • red and green finger paint
  • brown marker
  • yellow construction paper cut into the shape of a star
  • glue
  • smocks to keep child and adults clean


Instructions:

  • have the child make a row of five green palm-prints, side by each, about 20cm (4 inches) from the bottom of the page
  • have the child make a row of four 4 palm prints above that
  • again with three, two and one final palm print at the top of the "tree"
  • use red paint on fingertips to paint tree decorations / ornaments
  • glue the yellow star at the top of the tree
  • draw in a brown tree trunk at the bottom of the tree (alternately, use brown paint to paint a trunk or make a construction paper trunk)

Sunday, December 09, 2007

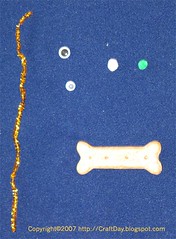
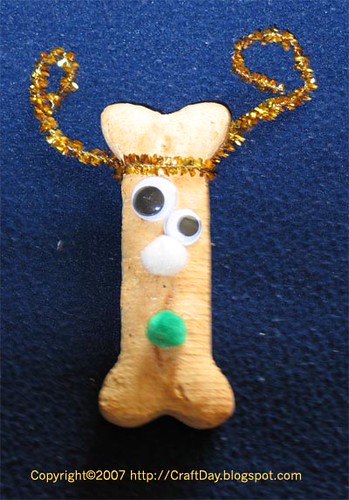
Reindeer treats

reindeer_treats_05

This was created with Santa's elves at our local mall.

Materials:reindeer_treats_01

  • doggie treat (milk-bone used in the photos)
  • pipe cleaner
  • 2 googly eyes
  • 1 small craft pop-pom (nose)
  • additional craft pom-poms for decorations
  • white glue


Instructions:

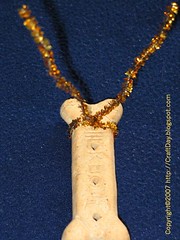
  • reindeer_treats_02 wrap the pipe-cleaner around to the back of the doggie-treat
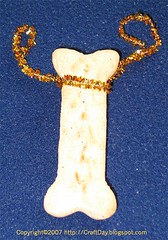
  • twist the pipe-cleaner to secure it to the treat


  • reindeer_treats_03 bring the pipe-cleaner out to the sides and curl to make stylized antlers
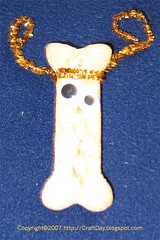


  • reindeer_treats_04 glue the eyes just below the antlers


  • glue the nose and decoration pom-poms below the eyes


  • now you have a reindeer shaped treat, to leave for the reindeer, along with your cookies and milk for Santa!


    reindeer_treats_05

Saturday, December 01, 2007

Notes to self: building better gingerbread houses

Things I learned about building gingerbread houses:
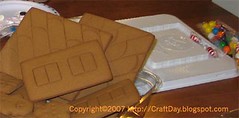
  1. gb_house_02If you're short on patience, buying a gingerbread house kit is a real sanity saver!
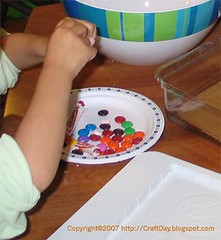

  2. Try and find the type of kit that has grooves / ruts / slots in the base which tell you where to put the walls and make assembly easier.


  3. gb_house_03Have a look inside the kit to see if the types of candy decorations included are the sort you feel comfortable having your helper children eat. (Some are choking hazards for pre-schoolers and toddlers.) Assemble some candy you don't mind your children eating to swap in when you remove the offending confections. (Leftover Hallowe'en Smarties and Rockets proved popular.)
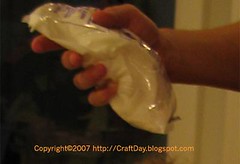
  4. Feed your children a healthy meal or a healthy snack prior to starting this activity. Even the best behaved child cannot resist the sugary sweetness of gingerbread house decorations!

  5. While you're unpacking the kit and trying to figure out the instructions, have little hands free Smarties and Rockets from their packages and put them in a bowl or plate. To stall for time, have them sort the decorations by type, size or by colour.

  6. gb_house_04If the instructions tell you to kneed the icing in the bag prior to using it, do so before you cut a corner off.
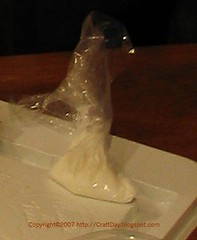

  7. The big bag of icing provided is much too big for little hands to manage.


  8. gb_house_05Get yourself a sandwich bag and cut a tiny corner off to make a mini-piping bag. Put some icing sugar in the cut corner of the sandwich bag.
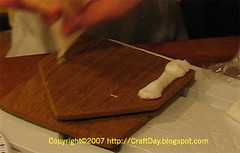


  9. gb_house_07Have the adult use the large icing bag to place pipe the thick beads of icing sugar acting as glue for the major house components.
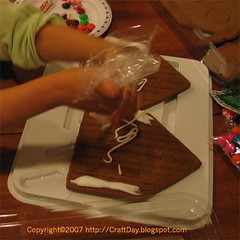


  10. gb_house_06Little hands can practice piping with their baggies on the interior walls of the house.
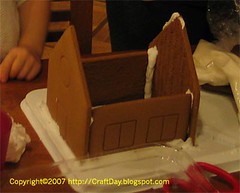


  11. gb_house_08Pipe a thick bead of icing in the grooves in the base for the four walls of the house.
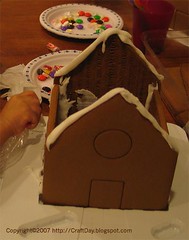
  12. Assemble the four walls in their grooves and apply pressure.

  13. Ensure that the four walls are stable prior to progressing. (Very important!)

  14. Pipe a thick bead of icing along the walls where they meet the base. (Inside and out.)


  15. gb_house_09 Little hands can put decorations in the icing along the base of the house, while larger hands are assembling the roof.
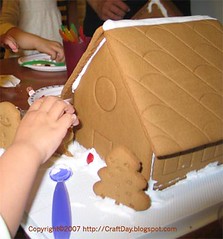


  16. gb_house_10It's VERY important that you wait the designated time (it was 15 minutes for us) holding the roof in position, prior to trying to decorate! It's not much fun trying to decorate a house where the walls keep caving in and the roof keeps sliding off!
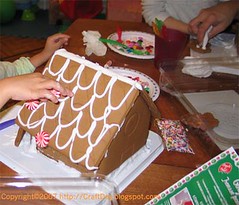
  17. I'd recommend having little hands decorate accessories (gingerbread men, gingerbread snowmen and gingerbread trees) on a level surface prior to assembling perpidicular to the base. (In contrast to the photoevidence.)


  18. gb_house_12Little hands can be decorating one side of the house while big hands are working on the other side.
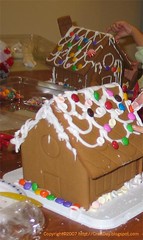
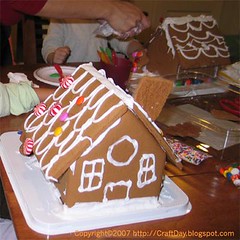
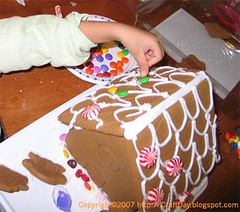
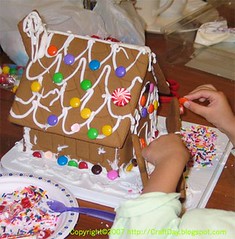
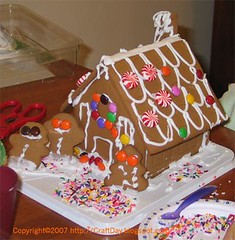
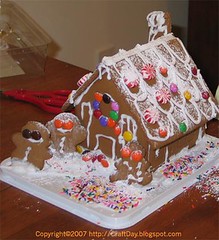
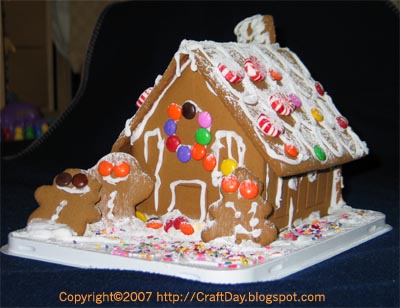
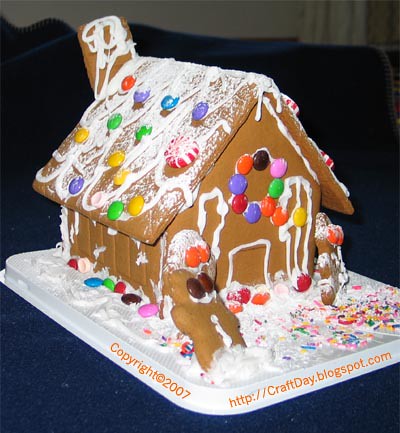


  19. While it's possible to pipe icing onto an already vertical wall (see photo below) it would have been much easier to put the decorative icing on the wall if it were flat. (Which, of course, would mean you'd have be be very careful while assembling the walls, not to smear icing all over the place.) Alternately, one could wait until the house was firmly cemented by the icing and then tip the house 80 degrees or so to do the decorative piping. (Not a likely option with anxious little hands!)

    gb_house_16 gb_house_13 gb_house_14 gb_house_17


  20. When everyone's finished decorating, put a tablespoon or so of icing sugar in a seive and shake over the project to give the appearance of a fresh snowfall.

    gb_house_18gb_house_19


  21. Now your challenge is guarding the house to make sure it doesn't get demolished overnight!

    gb_house_20 gb_house_21


Materials for above project:
  • table cloth for getting dirty (or easy to wipe table-top)
  • drop cloth (old table cloth or shower curtain) for floor if you plan on using sprinkles as a decoration (or easy to vacuum and mop floor)
  • gingerbread house kit (with slotted base)
  • alternate candy decorations (Smarties and Rockets)
  • plastic sandwich bags
  • scissors
  • plates, bowls and spoons for organizing decorations
  • seive
  • icing sugar (about a tablespoon)
  • spoon
  • patience
  • vacuum cleaner
  • wet cloths for cleaning little hands

Wednesday, December 20, 2006

Gingerbread man

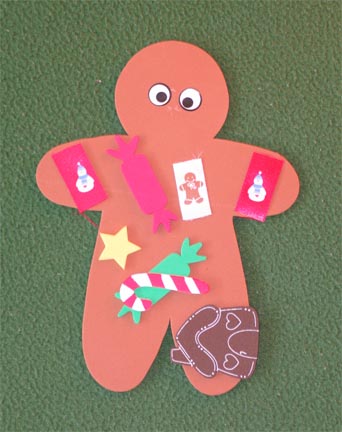
gingerbreadman This was created at our local Ontario Early Years Centre.

Materials:

  • brown construction paper or craft foam (the one shown was made with craft foam)
  • festive stickers, ribbons etc to be used for decorations (the one shown used festive foam stickers)
  • glue
  • markers, crayons, glitter etc for further decoration
  • ribbon (if you wish to make a hanging decoration)

Instructions:
  • have the gingerbread man shape cut out by an adult
  • decorate with stickers etc
  • affix ribbon (if yo uwish to make a hanging decoration)

Tuesday, December 19, 2006

Santa

santa_plate

This was created at our local Ontario Early Years Centre.

Materials:

  • paper plate
  • cotton balls
  • red construction paper
  • white glue
  • stickers, markers, crayons, glitter etc for decorating

Instructions:

  • cut out hat shapes (red hat and white trim)
  • glue hat to paper plate
  • create eyes, nose, cheeks with stickers or markers
  • glue on cotton balls as beard and hat decoration

Tuesday, December 12, 2006

Plate for Santa

This was created at our local Ontario Early Years Centre exclusively uses Christmas themed foam stickers.


plate_for_santa

Materials:
  • small paper plate

  • hole punch (for adult to use)

  • ribbon

  • things to decorate plate in theme of snacks for Santa Claus (such as foam Christmas stickers, markers, crayons, paint, cutouts, glue)


Instructions:
  • deocrate plate to look like snacks for Santa Claus

  • punch hole in paper plate near the "top"

  • put ribbon through the hole and tie in a loop

Use the plate to hang as a tree or door decoration!