Sunday, February 10, 2008

Heart sun catcher

heart_sun_catcher

(This idea came home from school.)

Materials:
  • white paper, letter sized (approx 22cm x 28cm or 8.5" x 11")
  • waxed paper (approx 22cm x 28cm or 8.5" x 11")
  • red paper (approx 22cm x 28cm or 8.5" x 11")
  • red acrylic paint
  • hole punch
  • scissors
  • white glue
  • ribbon (white, pink or red)

Instructions:
  • cut a large heart out of the red paper (leaving a red heart-shaped frame)
  • splatter red acrylic paint on waxed paper (in approximate area of cut-out of red sheet)
  • let red paint dry over night
  • glue waxed paper on top of white sheet of paper
  • glue red heart frame on top of waxed paper
  • let dry
  • punch hole in centre top of heart
  • put length of ribbon through hole, tie and hang on window

Thursday, February 07, 2008

10% off your next Mabel's Labels purchase!

Need clothing labels to send your kids to March break camp?
Run out of return address labels?
Need stationery kits?

Receive 10% off your next Mabel's Labels purchase!

Coupon code: NLEEFEB08


(Valid at Nicole's Mabel's Labels site through the end of March 2008.)

Wednesday, February 06, 2008

Heart necklace

heart_necklace

(This idea came home from school.)

Materials:
  • red, pink or white yarn, approximately 60 cm (2 feet) in length
  • blunt tip darning needle
  • cut-out hearts (size depending on age of child ... larger heart 8cm x 8cm (3"x3") for pre-schooler, smaller for grade-schooler) from different types and colour of paper
  • additional items for stringing: 2-3cm (1") length of coloured drinking straws, coloured pasta, multi-coloured "O" breakfast cereal etc
  • pen / marker / crayon for writing on hearts
  • hole punch

Instructions:
  • punch hole at approximately the centre of each paper heart
  • have child tell you the names of people they love, write each name on a separate heart (older children can do this part on their own)
  • thread yarn through darning needle
  • help child pass darning needle through decorations to start and then alternating between hearts and decorations until all hearts have been strung
  • finish with more decorations
  • tie loose ends together to complete necklace

WARNING:
The finished product could be a choking hazard if child left unsupervized. Child safety is your responsibility!

Wednesday, January 30, 2008

Woven heart pockets

heart_pockets

heart_pockets_decorated

Materials:
  • Pattern (download the PDF pattern*)
  • use this legend to decipher the folding symbols
  • coloured paper (contrasting colours)
  • scissors
  • paper-clips
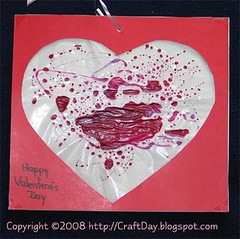
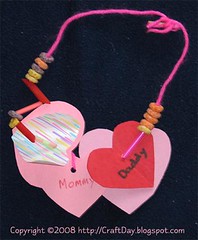
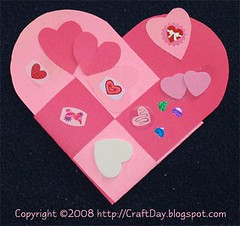
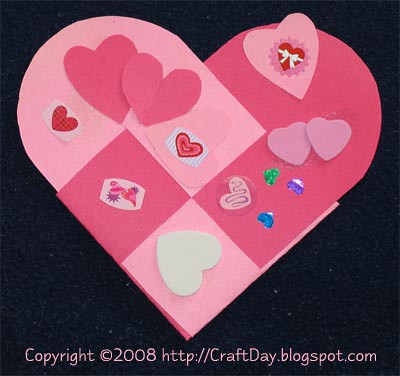
  • should you wish, materials for decorating your heart (eg. stickers, glitter and glue)


Instructions:
  1. print out the pattern (PDF file*) and transfer the pattern to your desired material or print it out as a practice run (be sure to check the specifications of your printer before printing on unusual media -- using "out of spec" materials can cause permanent damage to your printing hardware)

  2. heart_pocket_2_strip_01
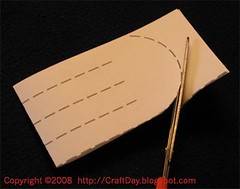
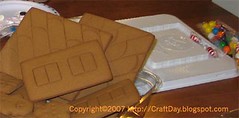
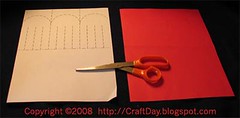
I've chosen to use one white sheet and one red sheet. Shown is the pattern printed on the white sheet.


  3. heart_pocket_2_strip_02
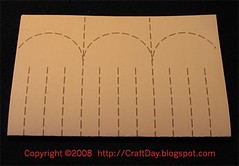
Fold the sheet with the pattern on it in half, length-wise. Orient the paper with the pattern facing up.


  4. Cut along the longest vertical lines.
    heart_pocket_2_strip_03


  5. heart_pocket_2_strip_04
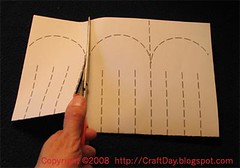
Should you find that the paper spreads when you cut it as described in step 4, either use the paper clips to keep the paper in place or begin cutting from the "open end" of the fold.


  6. heart_pocket_2_strip_05
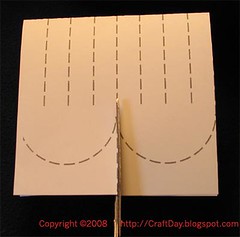
Trim the rounded edges of the paper. Again, if the paper doesn't stay in place, use paper clips to keep the paper steady.


  7. heart_pocket_2_strip_06Decide how many strips you want to weave. For the purposes of these instructions, we'll be making a simple two strip pocket. (Cut along the middle dotted line and ignore the first and third dotted lines.)

    If you're using a thick material, cut a little longer than the dotted line shown to give you room to work.

    To make a four strip pocket, cut along all three dotted lines.


  8. Repeat the above steps with the a sheet of contrasting colour.

  9. Orient the pieces at approximately 90 degrees, with the rounded edges pointing up and to the right respectively.


  10. heart_pocket_2_strip_08 heart_pocket_2_strip_07 
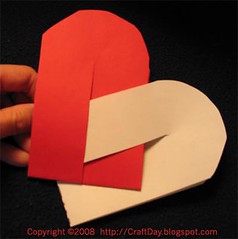
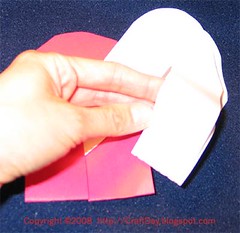
Take the right most strip of the red piece and push it in between the topmost strip of the white piece.


  11. heart_pocket_2_strip_10 heart_pocket_2_strip_09
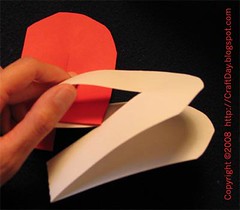
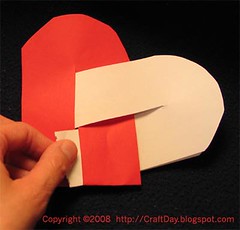
Take the bottommost white strip and insert it in between the rightmost red strip.

    (I'm not sure what happened with the photography here. Apologies for the glare.)


  12. heart_pocket_2_strip_11Pull the bottommost white strip all the way through.


  13. heart_pocket_2_strip_12
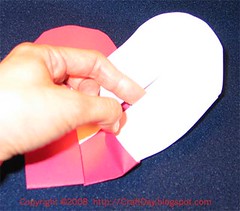
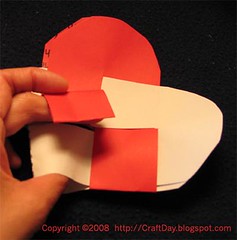
Insert the left-most red strip through the bottommost white strip that was pulled through in the previous step.


  14. heart_pocket_2_strip_open heart_pocket_2_strip_closed
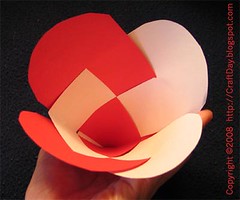
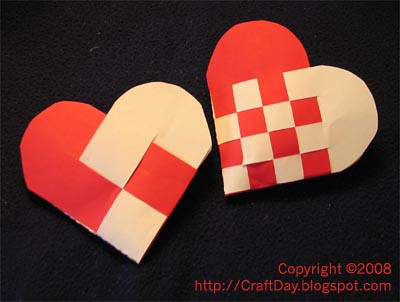
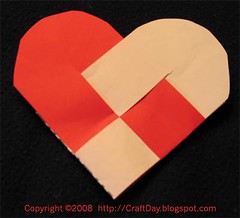
Straighten the pieces and voila!


Heart pockets can be used as "envelopes" when giving out Valentines cards (or candy). They can also be used as bags to hold Valentines received.


heart_pockets

heart_pockets_decorated

--

(*) When printing out PDF documents, be sure to set "Page Scaling" to "none" (you'll want the document to print at 100%). You may need to adjust the template on your paper depending on your printer's "offset" settings.

Thursday, December 20, 2007

Christmas hand print tree

hand-tree

(This idea came home from school.)

Materials:

  • large sheet of paper
  • red and green finger paint
  • brown marker
  • yellow construction paper cut into the shape of a star
  • glue
  • smocks to keep child and adults clean


Instructions:

  • have the child make a row of five green palm-prints, side by each, about 20cm (4 inches) from the bottom of the page
  • have the child make a row of four 4 palm prints above that
  • again with three, two and one final palm print at the top of the "tree"
  • use red paint on fingertips to paint tree decorations / ornaments
  • glue the yellow star at the top of the tree
  • draw in a brown tree trunk at the bottom of the tree (alternately, use brown paint to paint a trunk or make a construction paper trunk)

Sunday, December 09, 2007

Reindeer treats

reindeer_treats_05

This was created with Santa's elves at our local mall.

Materials:reindeer_treats_01

  • doggie treat (milk-bone used in the photos)
  • pipe cleaner
  • 2 googly eyes
  • 1 small craft pop-pom (nose)
  • additional craft pom-poms for decorations
  • white glue


Instructions:

  • reindeer_treats_02 wrap the pipe-cleaner around to the back of the doggie-treat

  • twist the pipe-cleaner to secure it to the treat


  • reindeer_treats_03 bring the pipe-cleaner out to the sides and curl to make stylized antlers


  • reindeer_treats_04 glue the eyes just below the antlers


  • glue the nose and decoration pom-poms below the eyes


  • now you have a reindeer shaped treat, to leave for the reindeer, along with your cookies and milk for Santa!


    reindeer_treats_05

Saturday, December 01, 2007

Notes to self: building better gingerbread houses

Things I learned about building gingerbread houses:

  1. gb_house_02If you're short on patience, buying a gingerbread house kit is a real sanity saver!


  2. Try and find the type of kit that has grooves / ruts / slots in the base which tell you where to put the walls and make assembly easier.


  3. gb_house_03Have a look inside the kit to see if the types of candy decorations included are the sort you feel comfortable having your helper children eat. (Some are choking hazards for pre-schoolers and toddlers.) Assemble some candy you don't mind your children eating to swap in when you remove the offending confections. (Leftover Hallowe'en Smarties and Rockets proved popular.)

  4. Feed your children a healthy meal or a healthy snack prior to starting this activity. Even the best behaved child cannot resist the sugary sweetness of gingerbread house decorations!

  5. While you're unpacking the kit and trying to figure out the instructions, have little hands free Smarties and Rockets from their packages and put them in a bowl or plate. To stall for time, have them sort the decorations by type, size or by colour.

  6. gb_house_04If the instructions tell you to kneed the icing in the bag prior to using it, do so before you cut a corner off.


  7. The big bag of icing provided is much too big for little hands to manage.


  8. gb_house_05Get yourself a sandwich bag and cut a tiny corner off to make a mini-piping bag. Put some icing sugar in the cut corner of the sandwich bag.


  9. gb_house_07Have the adult use the large icing bag to place pipe the thick beads of icing sugar acting as glue for the major house components.


  10. gb_house_06Little hands can practice piping with their baggies on the interior walls of the house.


  11. gb_house_08Pipe a thick bead of icing in the grooves in the base for the four walls of the house.

  12. Assemble the four walls in their grooves and apply pressure.

  13. Ensure that the four walls are stable prior to progressing. (Very important!)

  14. Pipe a thick bead of icing along the walls where they meet the base. (Inside and out.)


  15. gb_house_09 Little hands can put decorations in the icing along the base of the house, while larger hands are assembling the roof.


  16. gb_house_10It's VERY important that you wait the designated time (it was 15 minutes for us) holding the roof in position, prior to trying to decorate! It's not much fun trying to decorate a house where the walls keep caving in and the roof keeps sliding off!

  17. I'd recommend having little hands decorate accessories (gingerbread men, gingerbread snowmen and gingerbread trees) on a level surface prior to assembling perpidicular to the base. (In contrast to the photoevidence.)


  18. gb_house_12Little hands can be decorating one side of the house while big hands are working on the other side.


  19. While it's possible to pipe icing onto an already vertical wall (see photo below) it would have been much easier to put the decorative icing on the wall if it were flat. (Which, of course, would mean you'd have be be very careful while assembling the walls, not to smear icing all over the place.) Alternately, one could wait until the house was firmly cemented by the icing and then tip the house 80 degrees or so to do the decorative piping. (Not a likely option with anxious little hands!)

    gb_house_16 gb_house_13 gb_house_14 gb_house_17


  20. When everyone's finished decorating, put a tablespoon or so of icing sugar in a seive and shake over the project to give the appearance of a fresh snowfall.

    gb_house_18gb_house_19


  21. Now your challenge is guarding the house to make sure it doesn't get demolished overnight!

    gb_house_20 gb_house_21


Materials for above project:
  • table cloth for getting dirty (or easy to wipe table-top)
  • drop cloth (old table cloth or shower curtain) for floor if you plan on using sprinkles as a decoration (or easy to vacuum and mop floor)
  • gingerbread house kit (with slotted base)
  • alternate candy decorations (Smarties and Rockets)
  • plastic sandwich bags
  • scissors
  • plates, bowls and spoons for organizing decorations
  • seive
  • icing sugar (about a tablespoon)
  • spoon
  • patience
  • vacuum cleaner
  • wet cloths for cleaning little hands